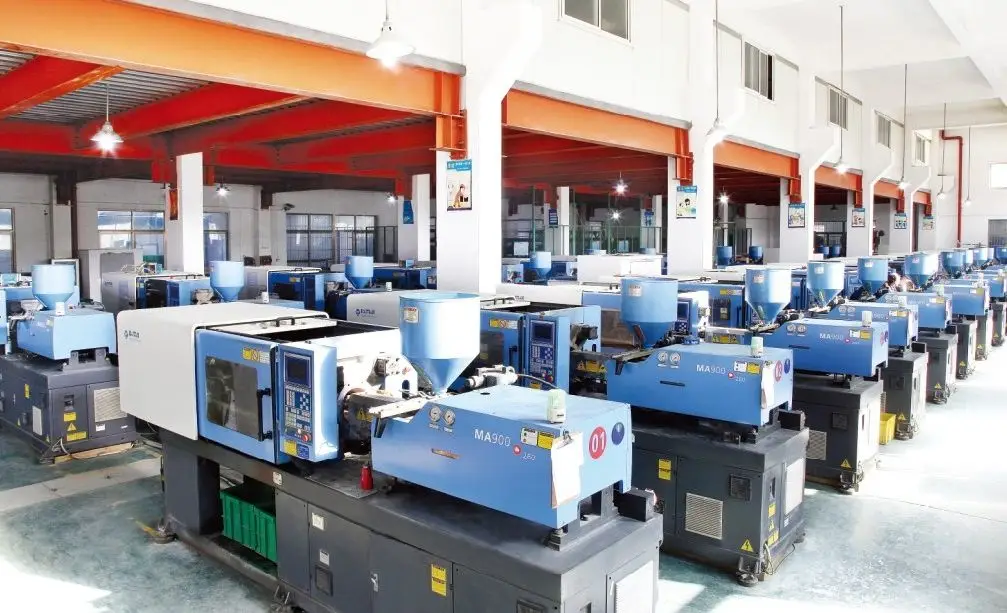
Preparations before mold change
Prepare for mold change according to the workshop production plan.
1, Put on a safety helmet and prepare rags, rust inhibitor, wrenches, and other demolding tools;
2, Inspect the mold to be assembled:
<1>. Select the appropriate machine to install the mold based on its external dimensions (in general, the workshop plans and assigns the machines, so there is no need to select them yourself);
<2> Check if the cooling water pipe joints of the mold are properly installed and if the water circuit is unobstructed (check by connecting the air circuit);
<3>. Does the mold use the core-pulling function? If so, please prepare oil pipes and oil pipe connectors and check them. If you find that the threads are not good, do not use it, so as not to damage the good threads and cause oil leakage.
<4> Install the lifting ring (not required for bent lifting rings). The depth to which the lifting ring is screwed into the mold must be greater than 1.5 times the diameter of the lifting ring. If the lifting ring surface is not yet in contact with the mold, a shim must be used to prevent the lifting ring from bending and breaking.
3, Inspect the crane:
The crane’s operation and the functionality of all buttons should be checked, especially the emergency stop button. If any problems are found, the crane should be stopped immediately, a “Do Not Use” sign should be hung up, and the foreman should be notified to report the problem for repair.
4, Inspect the wire rope and shackles:
Does the wire rope used have broken strands, loops, or is the suspended mold overloaded? If so, the wire rope should be replaced immediately.
The shackles used for lifting must not be bent or deformed, and must not be inconsistent with the tonnage of the lifting mold.

Key Points of Lifting Safety
The following points should be noted during the hoisting of molds:
1, For molds weighing 10 tons or more (including 10 tons), if four lifting rings can be used, two wire ropes must be used to lift all four lifting rings. The load capacity of each shackle used must not be less than 10 tons. For molds weighing less than 10 tons, a single wire rope with two lifting rings should be used.
2, When hooking the hook, it is strictly forbidden to operate the crane while hooking the hook, to prevent fingers from being caught between the hook and the wire rope and getting injured.
3, After the mold is lifted, check whether it is level. It must not tilt to the left, right or forward. A slight backward tilt is allowed.
4, When lifting a mold using a single lifting ring, a mold locking connector must be used to prevent the mold from swaying or separating from the moving and stationary molds. When lifting the mold, concentrate and be extremely careful, paying attention to the direction of the buttons to avoid pressing the wrong button and causing an accident.
5, When lifting the mold, it should be done slowly (do not lift it suddenly). The height should be less than 80 mm off the ground. After the mold is moved in front of the machine and the shaking is stopped, it can be raised and moved to the middle of the template. Before entering the Green Column, one person must be above the template on the machine to direct and stabilize the mold. It is strictly forbidden for the mold to collide with the Green Column, which may damage the Green Column and the copper sleeve of the template.
6, It is strictly forbidden to operate under the suspended mold. When lifting the mold, the operator should maintain a distance of more than 1 meter (horizontally) from the mold. When installing the water nozzle under the mold, no part of the body except the palm of the hand is allowed to be in the area where the mold will fall.
7, During the hoisting of the mold, people in the passageway should be notified to make way. It is strictly forbidden for the hoisted mold to pass over people or machines.
8, It is strictly forbidden for molds to remain in the air for an extended period of time (more than 10 minutes) or for the person lifting the mold to leave the site.
9, When a crane malfunctions or exhibits abnormal phenomena (such as unusual noises, burning smells, the suspended item sliding down automatically, or a button that can still operate briefly after being released), the suspended item should be lowered immediately, the crane should be stopped from being used, a “Do Not Use” sign should be hung up, and the foreman should be notified to report the problem for repair.
Mold Installation and Machine Adjustment
1, Before removing the mold, the mold to be disassembled must be cleaned, lubricated, and rust-proofed. It must be confirmed that the length of the wire rope is sufficient to lift the mold out of the machine. Before the pressure plate is loosened, the crane must be used intermittently to tighten the mold or shake the wire rope to check the tightness, so as to prevent the mold from sliding down after opening.
2, Before loading the mold, the mold opening/closing speed should be reduced to 25% or below (slow speed) for Chen Hsong and Chen Te CPC2.2 computers. The cancel and adjustment functions should be pressed simultaneously. All operating buttons should be set to manual mode, especially for machine #11, where the zero point setting must be manual. For machine #10, the high-pressure permit OFF position must be turned off. Set the machine to low-pressure manual mode.
3, Before hoisting the mold in, measure the mold thickness and adjust the mold. After that, check that the height of the ejector pins is consistent and that the mold holes match before hoisting the mold in. After the positioning ring is aligned, the template should be flush with the mold before locking the mold and moving forward.
4, Do not adjust the mold by moving it (except for fine adjustments within 10 mm).
5, The oil pump should be turned off during mold loading, except for mold adjustments that require the oil pump. Do not pull or drag the mold when adjusting its position inside the machine. Molds that need to be reversed after closing must be secured with a locating ring (suitable for machines No. 4 and below).
6, When the mold does not have a locating ring and needs to be aligned, it is strictly forbidden to place your hand between the mold and the nozzle. When observing the “mold alignment sheet”, the heating must be turned off.
7, The molds for machines 1 to 10 must have at least 8 pressure plates installed. For machine 10, which uses hydraulic pressure plates, two additional pressure plates are required on each side of the moving and fixed molds. The screws at the bottom of the moving mold must be tightened to prevent the mold from sliding down. Machine 11 uses magnetic templates; a green light indicates that the mold is engaged, and a red light indicates that it is demagnetized.
8, When fixing the pressure plate, it must be firm and reliable. The screw threads must be screwed in to a depth greater than 1.5 times the screw diameter. The shims or pads must be at the same height as the base plate of the mold being pressed, or 1-3 mm higher than the base plate. The pressure plate screws should be placed at the front closest to the mold, and the shims should be placed at the back.
9, Do not use open-end wrenches to tighten screws. Bent pressure plates and slipped nuts and screws must not be used.
10, To prevent excessive torque on the screws, the required sleeve length is as follows: 25-30 cm for M16 screws, 40-45 cm for M20 screws, and 50-55 cm for M24 screws.
11, The hook shackle must be removed before opening the mold after installation, and the wire rope and shackle must not be pulled to open the mold. The lifting rings must not be removed after the molds used on machines 10 and 11 are installed. Remember: Loosen the locking plates before opening the mold.
12, For molds with hot runners, the stationary mold must be circulated with cooling water before being heated to prevent the internal seals from aging and leaking.
13, When someone is cleaning or repairing the mold inside the machine, no one is allowed to turn on the power or adjust the parameters on the control panel.
14, Molds must not be stacked in two layers. They should be placed in the designated locations according to their numbers. New molds that are brought in for trial use should be temporarily placed in the mold repair area.
15, After the mold is installed, open the mold (do not leave the machine hinge in a locked state for a long time), adjust the position of the mechanical safety bar, connect the water pipe, and connect the oil pipe if there is a core puller. Debug the operation and ensure there is no oil or water leakage.
Cleaning and Hygiene of the Machine Area
1, All tools on the machine, such as screws, pressure plates, positioning rings, wrenches, and sleeves, must be placed in their designated locations.
2, The cooling water pipe for the mold should not be too long. Allow about 20 cm of extra length based on the actual length of the mold after it is opened.
3, For molds equipped with insert and insert cores, when disassembling and assembling oil pipes, be sure to prepare a small plastic box to collect any leaked hydraulic oil. For unused oil pipes, drain the oil from the pipes before placing them in the designated positions.
4, Finally, wipe the machine and the floor clean with a cloth.
